Technology (STEM)
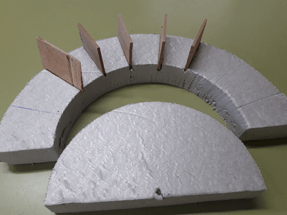
Semicircular arch mould
Images

3d model information
Technology:
FDM
Material:
PLA
Sizes:
280x300x100 mm
Accuracy:
Medium
Resistance:
High
Printing time:
1-2 days
Number of pieces:
4 + Various separators
Links and resources
STL Files Viewer
Summary
This unit is about Structures and Technical Drawing.
Students will work in a collaborative way by means of the project-based learning methodology.
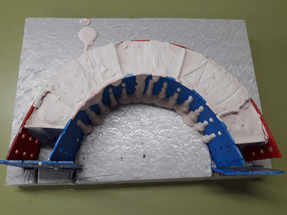
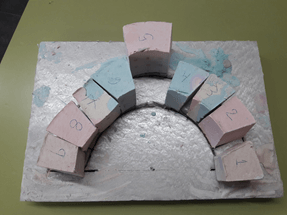
They will have to design, draw and build a semicircular bridge, using plaster for the wedge-shaped stones, throughout a 3D printed mould in the required size and evaluating it’s functionality by applying compression stress.
Learning objectives
- To design a prototype to find a solution to a technical problem throughout the technological process.
- To elaborate the required reports in order to plan and build the prototype.
- To interpret technical drawing, plans and sketches as an information element of technological products.
- To represent using views and perspectives objects and technical systems, throughout sketches and plans with standardisation criteria regarding scales and annotation.
- To identify and manipulate the workshop tools in forming operations of technical materials.
- To elaborate the project worksheet attending health and security rules.
- To describe using written, digital and media information the main characteristics of each type of structure.
- To identify typical forces and stresses, and their transmission throughout the structural elements which form the structure.
Teacher preparation
- The Technology teacher will prepare the worksheet and digital presentation to introduce the project to the students.
- Both materials and tools will be ready to use in the workshop.
- A template for the report will be given to the students so that they can fill it in meanwhile they are in the design and build phases of the Technical Process.
Teacher explanation
- The teacher explains the topic and objectives of the project.
- Students must know previously the basics of technical drawing, Autocad, structural elements, tools, health and security rules in the workshop and the different parts of a project report.
- Explanation of 3D printers functioning and 3D design guide.
- Split up the students into groups of 4.
Student activity/Steps
In each group of 4 students they will have to design and build a plaster semi-circular arch and deliver the technical report of this project. The steps to follow are:
1. Design and draw the bridge: plans using scales and annotations.
2. Design and draw the mould, in the correct size and with the possibility of using a different number of wedge-shaped stones.
3. 3D print the mould. Pour plaster into it and let it dry before removing.
4. Build the bridge, leaving for the end the keystone.
5. Test of resistance to compression stress.
6. Delivery of the technical report of the project, including requirements, plans, worksheet, used materials and tools, and individual feedback about the didactic unit.
General Info
Age of students
13-14
Skills needed
3D printing, computer design
Duration
4 periods
Individual/Groups
Group
Materials
PLA, plaster
Tools
3D printer, saw, compass, set square, file
Software
Cura, Tinkercad
License Info
License name:
Attribution 4.0 International (CC BY 4.0)
License details:
You are free to: Share — copy and redistribute the material in any medium or format. Adapt — remix, transform, and build upon the material for any purpose, even commercially. Under the following terms: Attribution — You must give appropriate credit, provide a link to the license, and indicate if changes were made. You may do so in any reasonable manner, but not in any way that suggests the licensor endorses you or your use. No additional restrictions — You may not apply legal terms or technological measures that legally restrict others from doing anything the license permits.
More info:
I printed it
If you printed this exercise you can register and share it with the community:
Create a new accountOr Login if you are registered.

