
Geography
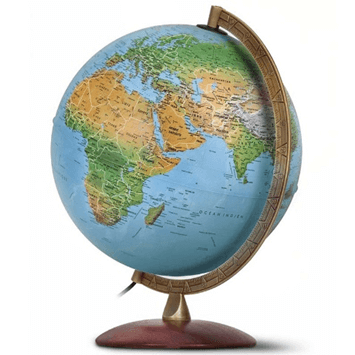
The globe
Images


3d model information
Technology:
FDM
Material:
PLA
Sizes:
200x18x280mm overall
Accuracy:
Medium
Resistance:
Medium
Printing time:
TBD
Number of pieces:
4 piece(the globe in 2 half, a base and a support)
Links and resources
STL Files Viewer
Summary
This lesson is about designing and printing a 3D globe with embossed continents in order to understand the right geographic position of the continents, their location, the understanding of the different oceans and the territorial structure of the globe. It will also serve to understand the 3D printing techniques.
Learning objectives
The students will be able to:
– Design the globe with Rhinoceros, Sketchup or Inventor Educational or with other suitable CAD software.
– Identify the different continents and oceans.
– Create in their mind a mental map of the world.
– Know and locate the right geographic position of the different continents (their territorial structure, their breadth, their diversity).
– Use interpretative models of territorial structures of the globe, in relation to their historical, political and economic evolution.
– Prepare CAD files to be printed.
– Learn 3D printing techniques.
– Setting the 3D printing file.
– Print the 3D model of a 3D globe.
Teacher preparation
Preparation about the guided lesson in the classroom. Development of theoretical exercises to be implemented during the classroom lesson in order to make the lesson as more interactive as possible.
Teacher explanation
– Introduce the topic and the objective (the globe and its transformation along the years).
– Explain the basic of the 3D software to use for e.i. Rhinoceros, Sketchup or Inventor Educational.
– Guided designing of the 3D globe
– Explain how to save the file and how to export to the suitable format (.STL, .OBJ…).
– Explain the basic about 3D printing.
– Explain how to set the file on the coding software, Cura.
– Show how to obtain the G-Code.
– Explain how to prepare the 3D printer for launching works
Student activity/Steps
– Design the globe.
– Saving and exporting to the suitable format, STL. OBJ….
– Select the suitable setting on Cura for printing the 3D.
– Launching the file on the 3D printer.
– Try the design.
– Participate to the exercised proposed by the teachers.
General Info
Age of students
12/14
Skills needed
Basic CAD, 3D print, geography, art and technique skills.
Duration
3 lesson (60’ each of one)
Individual/Groups
Group
Materials
PLA
Tools
Spatula, glue, pencils, sheets, ruler, computer.
Software
Cura, Rihnoceros or Sketchup or Inventor Educational.
License Info
License name:
Attribution 4.0 International (CC BY 4.0)
License details:
You are free to:
Share — copy and redistribute the material in any medium or format
Adapt — remix, transform, and build upon the material
for any purpose, even commercially.
Under the following terms:
Attribution — You must give appropriate credit, provide a link to the license, and indicate if changes were made. You may do so in any reasonable manner, but not in any way that suggests the licensor endorses you or your use.
No additional restrictions — You may not apply legal terms or technological measures that legally restrict others from doing anything the license permits.
More info:
I printed it
If you printed this exercise you can register and share it with the community:
Create a new accountOr Login if you are registered.